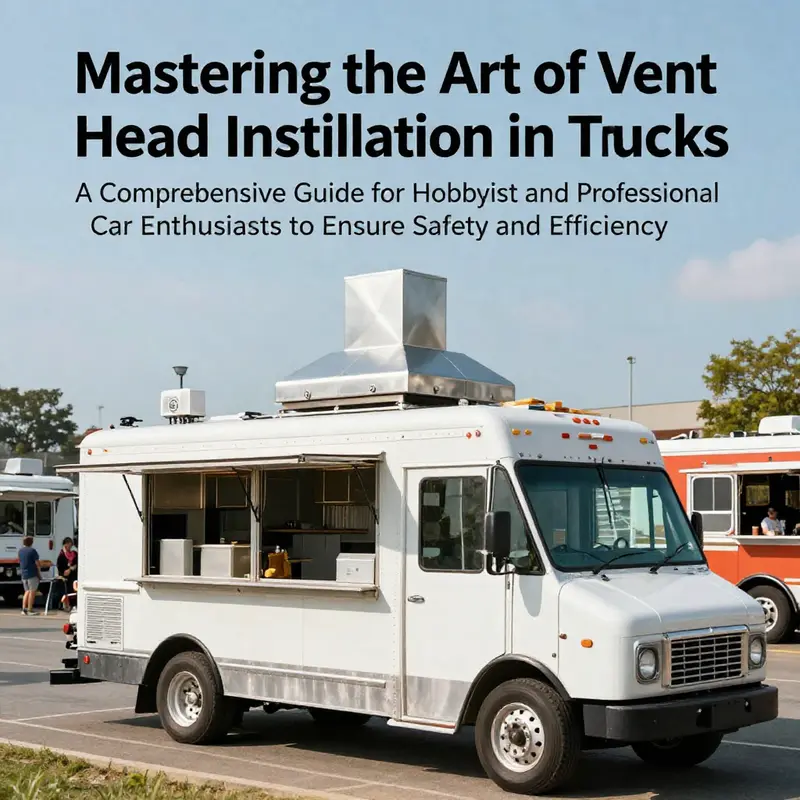
Installing a vent hood in a food truck is crucial for maintaining air quality while cooking on the go. With proper planning, you’ll create a safe, efficient workspace. This guide dives deep into identifying the finest vent hood systems, choosing the ideal installation location, executing a secure mounting of the hood frame, and expertly installing the exhaust fan and ducting. Each chapter unfolds vital insights to empower both hobbyists and professionals in the automotive and food service fields to tackle this essential task with confidence and expertise.
Blueprint for a Safe, Efficient Kitchen on Wheels: Preparation and Planning to Install a Vent Hood in a Food Truck
A vent hood is not just a piece of equipment; it is the backbone of a portable commercial kitchen. Planning ahead isn’t a cosmetic step but a foundation for safety, efficiency, and compliance. In a food truck, where space is precious and conditions vary with every stop, the prep stage should read like a precise blueprint rather than a hurried checklist. The core idea is straightforward: the hood must capture heat, smoke, and grease efficiently, while fitting the vehicle’s structure, surviving movement, and meeting fire and health codes. Begin with that mindset and you will prevent a cascade of problems down the line.
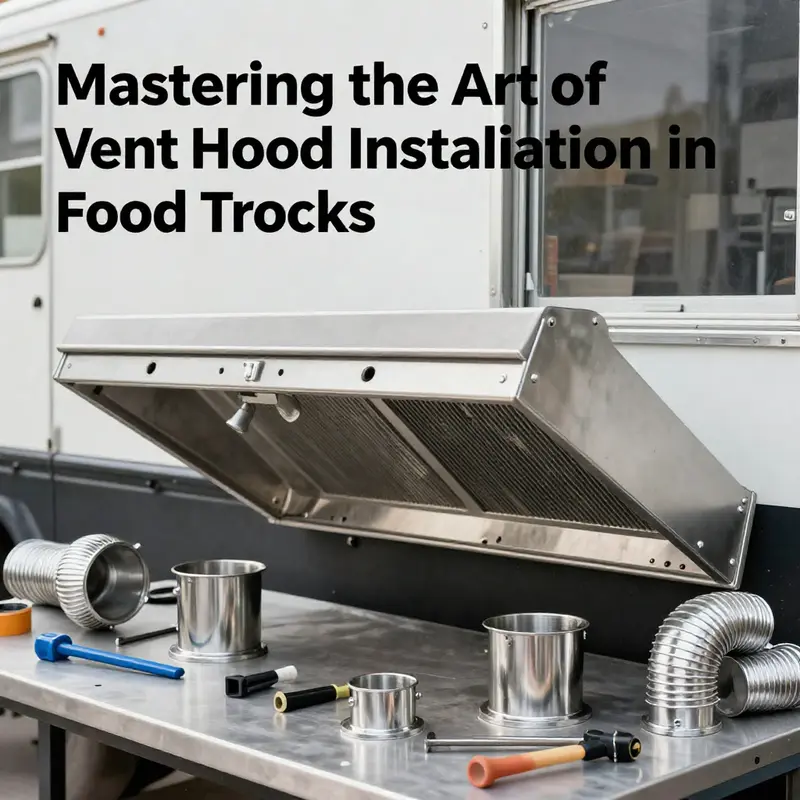
Choosing the right vent hood starts with understanding the cooking footprint. Mobile kitchens differ from brick-and-mortar operations because the equipment often sits in tight, oddly shaped spaces and must travel safely between locations. The hood you select should be designed for mobile kitchens and comply with recognized standards. Its size and airflow capacity, measured in CFM, must align with the type and number of burners, grills, or fryers beneath it. A hood that is too small or an exhaust fan that moves air too slowly will leave grease vapors lingering and strain the system, creating heat buildup and smoky backdrafts. Conversely, an oversized unit can over-vent, wasting energy and adding weight where space is already at a premium. The balance you seek is one where the hood covers the primary cooking zone adequately, while the ducting path remains as short and straight as possible to maintain peak efficiency.
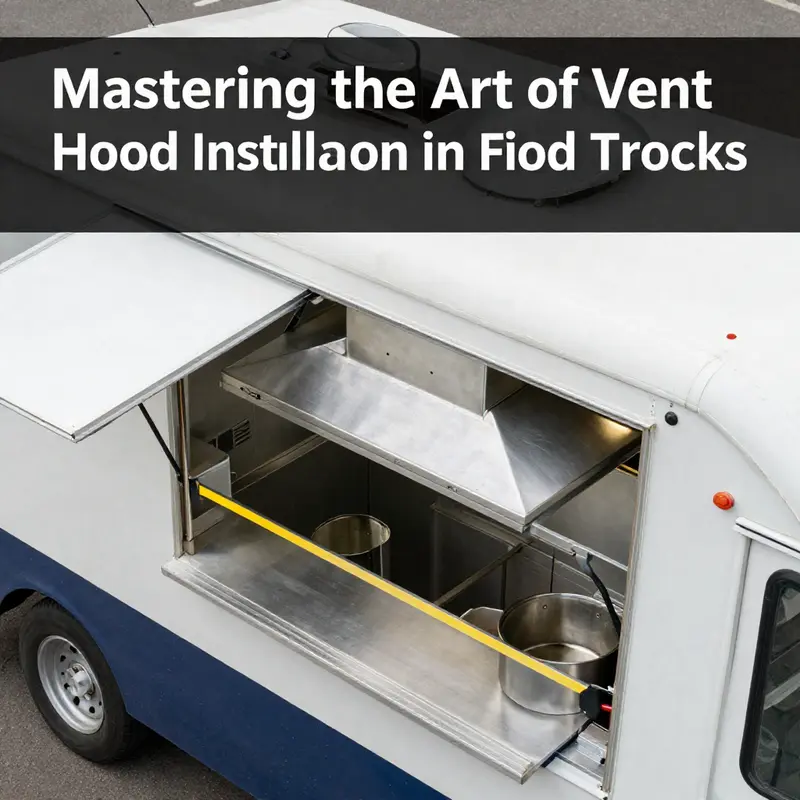
From the start, the layout must be imagined as a system, not as isolated parts. The hood should sit directly above the main cooking appliances to maximize capture efficiency. This alignment reduces grease particulates in the air and minimizes the distance vapors have to travel through ductwork. Assess the truck’s roof and interior structure to ensure there is no compromising load and that the mounting area can bear the weight of the hood, the fan, and the ductwork. Reinforcements may be necessary if the vehicle’s original structure wasn’t designed to carry heavy, fixed installations. Clearance is critical not only for heat and fire safety but also for servicing the hood, replacing filters, and performing duct inspections. Remember that wherever you set the hood, there must be enough room to access electrical connections and to perform routine maintenance without contortions.
The ducting itself is a crucial piece of the planning puzzle. Use non-combustible material—stainless steel is the standard in mobile kitchens—and design the run to promote a steady, gravity-assisted condensation drain. The duct must slope slightly so grease and condensate flow away from the hood toward the exterior. Flexible sections have their place in tight corners, but they should not become a substitute for well-planned straight runs. Sharp bends are the enemy of airflow; they trap grease and impede exhaust efficiency. Joints and seams demand attention, with high-temperature duct tape or metal foil tape sealing every connection. The goal is a continuous, smooth pathway for air from the hood to the outside world, free of leaks that could compromise fire protection or indoor air quality.
Electrical considerations are the engine that powers the system. The exhaust fan requires a dedicated electrical supply, typically a separate 110V or 220V circuit, depending on the model and its power needs. The wiring should be routed safely, isolated from other circuits, and terminated at a grounded source with proper overcurrent protection. A Ground Fault Circuit Interrupter (GFCI) outlet is a common, prudent safeguard in a food truck environment where water and steam are in play. Once the electrical plan is in place, it becomes a map for all future maintenance. It also reduces the risk of nuisance tripping or fire hazards caused by overloaded circuits because the vent hood is drawing power from a sole, purpose-built line. The electrical layout must be integrated into the truck’s overall electrical plan, not tacked on as an afterthought.
Safety codes are not negotiable features to be addressed after installation. They are the road map that keeps workers and customers safe. NFPA 96, the National Fire Protection Association Standard for Ventilation Control and Fire Protection of Commercial Cooking Operations, provides the authoritative framework for designing, installing, and maintaining vent hoods in both fixed and mobile kitchens. A careful reader will recognize that planning around NFPA 96 early in the process pays dividends later during inspections and insurance reviews. Compliance shapes every choice from hood type to duct routing, from fan power to maintenance intervals. The more you align your plan with these standards, the less you will worry about noncompliance surprises when a health department or fire marshal visits your truck.
As you map the layout, consider the broader realities of operating a mobile kitchen. The hood’s location can influence workflow, food safety, and even customer experience. A hood installed too far from the cooking zone may pull air from where it is least effective, forcing extra fan work and creating noise and turbulence in the kitchen. A hood that sits too close to a prep area or storage can create heat and grease splash risks that undermine sanitation. The most successful installations respect both the science of air movement and the practicalities of a working kitchen on wheels. The planning stage should also address maintenance logistics. In a mobile setting, access for filter changes, duct cleaning, and occasional removal for larger service should be straightforward, not a puzzle that requires disassembly of the entire kitchen. The plan must consider how crew members move around the space daily, ensuring the hood’s service points are reachable without disrupting service.
A well-planned project anticipates future needs as well. It is easy to overbuild for today’s menu and later discover that tomorrow’s offerings require higher throughput or additional cooking surfaces. Planning for flexibility means considering modular duct sections, adjustable fan controls, and a hood that can accommodate potential expansions without a full teardown. It also means budgeting for a professional inspection at milestones, such as after installation, before the truck hits the road, and periodically during operation. The industry consensus is clear: a thoughtful preparation phase pays for itself in reduced downtime, improved safety, and fewer compliance headaches.
Internal coordination is a factor that often gets neglected in the rush of launching a mobile kitchen. The prep phase should involve the entire team, from the owner and operators to the technician who will install the hood, and, if possible, a licensed contractor with experience in mobile kitchens. This collaborative approach helps align expectations on weight, fuel and electrical demands, and the truck’s overall electrical load. Documentation is not merely bureaucratic; it is a practical tool. A well-documented plan, including mounting diagrams, duct routing schematics, and inspection logs, streamlines future maintenance and regulatory reviews. It also makes it easier to communicate clearly with installers, inspectors, and insurers, reducing miscommunication at every turn.
In the spirit of practical guidance, consider one of the most useful touchpoints during planning: reference materials that connect the dots between installation and compliant operation. For deeper, codified guidance on ventilation control and fire protection, many operators turn to NFPA 96. This standard provides the framework for how the system should be designed, installed, and maintained, including details on hood construction, duct sizing, fire suppression integration, and periodic cleanings. While you won’t memorize every clause, you will benefit from knowing where to find the authoritative requirements and how they translate to your truck’s layout and components. Keeping a copy of the relevant sections and a clear, concise plan sketch on hand during installation reduces ambiguity and supports smoother inspections.
As you prepare to move from planning to execution, a practical mindset helps. Treat the vent hood as a critical life-safety system, not just a kitchen appendage. The differences between a well-planned installation and a rushed one show up in every downstream task—from the ease of cleaning to the reliability of ventilation during peak service. A meticulous approach to site readiness, material selection, mounting methods, duct routes, and electrical integration will yield a system that operates effectively in a moving kitchen and stands up to the scrutiny of inspectors and customers alike. It is not glamorous, but it is essential. The result is a vent hood that performs as designed: drawing heat and grease away from the crew, protecting the building and the people inside the truck, and keeping the operation compliant under the most vigilant eyes.
For readers exploring these planning considerations in a broader context, see the related discussion on legal considerations for Latino food truck startups. It offers a practical companion perspective on navigating permits, inspections, and codes while provisioning your mobile kitchen infrastructure. legal-considerations-latino-food-truck-startups.
Finally, it is worth acknowledging that preparation is an ongoing discipline. The day you install the hood is the day you begin a cadence of preventive maintenance, regular inspections, and thoughtful upgrades. A scheduled maintenance routine, including duct cleaning and vent hood seal checks, protects both your crew and your customers. It also minimizes the risk of grease fires, which can arise from neglected ductwork and grease buildup. The work you invest in the planning phase translates into a safer, more efficient, and more reputable operation on every route you take. The end goal is simple: a kitchen on wheels that breathes clean air, stays within safety codes, and enables your team to cook with confidence, even in the tight confines of a bustling street.
External resource for further guidance: authoritative guidelines are published in NFPA 96. You can consult the standard for comprehensive ventilation and fire protection guidance at https://www.nfpa.org/Code-Updates/NFPA-96.
Choosing the Optimal Vent Hood Location: Safety, airflow, and compliance in a mobile kitchen
Selecting the installation location for a vent hood in a food truck is not merely a matter of design taste or convenience; it is the hinge on which safety, performance, and regulatory compliance swing. The hood should sit where it can do its work without fighting against its own exhaust. In practical terms, this means positioning the hood directly above the cooking surface—whether that surface is a griddle, a grill, or a fryer—to capture grease-laden smoke and vapors at the source. When capture at the source is strong, the grease film that would otherwise cling to walls, ceilings, and hood components is minimized, and the risk of flare-ups from accumulated grease is reduced. This is not abstract theory; it translates into fewer maintenance headaches and a more predictable, efficient ventilation cycle that keeps the kitchen air safer and more comfortable for cooks who are hustling through back-to-back service minutes. The alignment also matters because a hood that is offset from the cooking zone introduces additional duct length and potential turbulence. Every extra inch of duct run adds a place for grease to accumulate, reduces the effective inlet velocity of the fan, and can create pockets where smoke lingers instead of being carried out the exit. So the first, most fundamental decision is to anchor the hood plan as tightly as possible to the cooking zone, ensuring that the equipment’s footprint on the countertop or cookline is reflected in the hood’s footprint overhead. This requires thoughtful measurement and a careful review of the truck’s cooking layout to confirm that the hood’s width and depth complement the range or frying setup, leaving room for filters, blowback protection, and the operator’s posture when reaching up to operate controls or perform maintenance. Once the cooking zone and hood alignment are settled, the path from the hood to the exterior becomes the next crucial thread in the location decision. The duct run should be as direct as possible, avoiding unnecessary bends that snipe airflow or create turbulence. A straight or gently curving route minimizes resistance, keeps static pressure consistent, and helps the exhaust fan perform at its rated capacity. In a mobile kitchen, this often means routing the duct through a roof or side wall with minimal obstructions. It is here that the choice between roof exit and side-wall exit comes into play. A roof-mounted exit can simplify the vertical run and reduce the number of turns, which is beneficial for maximizing exhaust efficiency and ensuring the dampers and terminations stay clear of obstructions during travel. A side-wall exit might be preferred when structural constraints or local rules favor a low-profile installation or when the roof is obstructed by venting hardware or equipment on top of the truck. Whatever route is chosen, it must terminate outdoors and not vent into an enclosed space such as an attic, crawl space, or under the truck’s floor. The danger of recirculation is not simply theoretical: it undermines the system’s purpose and can contravene local health or fire codes. If a recirculating system is used, it defeats the purpose of removing heat, smoke, and grease and can contribute to a lingering odor that affects both staff and customers. The exhaust outlet’s location is also a matter of airflow psychology. It should discharge away from doors, windows, and high-traffic pedestrian areas so that gusts don’t blow smoke back into the customer line or into the truck’s entrance. A clean discharge path helps avoid backdrafts that pull exhaust back into the kitchen, especially during door openings when staff move in and out. It’s worth noting that the path must be kept clear of other vehicles or equipment that could disrupt the exhaust stream. The physical siting of the hood then informs a set of practical building blocks—mounting, fastening, and weather protection—that must be integrated with electrical and fire safety considerations. The hood’s frame needs solid support from the truck’s structure, and any penetrations through the roof or wall require weatherproof sealants to prevent leaks that could degrade insulation, encourage corrosion, or create comfort problems for the crew. When you mark the mounting points, you are not only securing a large metal object; you are also establishing the backbone for a line of sight that lets staff perform routine maintenance without wrestling with the unit. The choice of ductwork materials is critical too. Rigid metal duct is strongly preferred to flexible plastic or foil when possible. Rigid metal sections resist crushing, maintain smooth interior surfaces for better airflow, and are easier to seal reliably, which matters for long-term performance and cleaning. Flexible ducts sometimes have kinks, creases, or compression points that impede airflow and trap grease, which makes cleaning more challenging and increases the risk of blockages. While the route should be as straight as practical, the realities of a mobile kitchen—ceiling heights, equipment modules, doors that swing on a hinge, and the truck’s frame ribs—mean that flexibility is occasionally necessary. In those moments, plan for the least-bend approach, use high-temperature rated flexible ducts only where modest articulation is unavoidable, and secure them with clamps and sealant rated for heat and grease resistance. Respect for safety codes governs not only the ducting itself but also the electrical and fire safety interfaces. A dedicated electrical circuit is usually required for the fan, and a properly grounded, GFCI-protected outlet is often a non-negotiable provision in mobile kitchens. The electrical draw must be matched to the hood and fan’s specifications, with attention paid to voltage, frequency, and current. The integration of the hood with a power source must be part of the broader electrical plan for the truck, so it lines up with the vehicle’s service capabilities and the other cooking loads sharing the same electrical feed. NFPA 96, the standard for ventilation control and fire protection of commercial cooking operations, provides the framework for these decisions. It calls out the need to deploy a properly engineered venting system and to maintain it through regular cleaning and inspection. In practice, compliance means documenting the installation, selecting components that meet or exceed the standard, and scheduling routine maintenance that prevents grease buildup and mechanical wear from compromising performance. The human factor in location selection is not to be underestimated. The hood’s position affects the crew’s workflow. If the hood sits in a space that forces cooks to reach awkwardly or lean toward a hot surface while reaching for controls, fatigue and the risk of accidents increase. The siting should respect the cooks’ ergonomic lines: the hood should feel like a natural extension of the cooking zone, not a foreign obstacle to be navigated around. Maintenance access is another important dimension. The hood and duct joints should be accessible for cleaning, inspection, and service without disassembling heavy components. Designing for easy access reduces the time and effort required for weekly grease removal, which, in turn, reduces the chance of buildup and fire hazard risk. To ensure that the broader regulatory conversation is brought into focus without getting bogged down in a single jurisdiction’s quirks, it can be helpful to consult resources that cover the landscape of regulatory concerns for mobile food operations. For a broader regulatory context, see Legal considerations for Latino food-truck startups. The practical takeaway is that installation location is not just a technical choice; it is a compliance decision as well. And given the complexity of mobile setups, many operators find it prudent to enlist a licensed electrician and, where needed, an HVAC professional to review the plan before any cutting or drilling begins. The initial survey, measuring, and layout verification are all steps that pay dividends when the system finally goes live. After the preferred exit strategy and mounting scheme have taken shape, a careful evaluation of local requirements about exhaust height above ground, the method of penetration, and the exact route to the exterior becomes essential. Local regulations can specify a minimum vertical drop from the exhaust to ensure that fumes are dispersed adequately, and that the exit area remains accessible and clearly visible. The truck’s venting must be configured to keep rain and pests from entering the duct, typically through a weatherproof termination cap and backdraft damper. It is the small hardware choices, the right sealants, and the proper dampers that keep the system robust across a wide range of outdoor conditions—from sweltering summer days to late-season rain. The end of this design conversation is not a conclusion but a handoff to installation work that will be performed with the hood and duct kit in mind. The location decision informs every subsequent step: mounting through the roof or wall, connecting the exhaust fan to the duct, routing the ducts with minimal turns, and ensuring that every penetration point is sealed against leaks. And as with any professional undertaking, documentation and adherence to the installation manual—along with the NFPA 96 standards—provide the guardrails that protect both the crew and the customers. For a precise, hands-on reference to steps, clearances, and cautions, practitioners should consult the official installation manual supplied with the equipment. This document offers the specific measurements and procedures required for the model in use, reinforcing that the general guidance outlined here must be aligned with the manufacturer’s instructions to achieve a safe, compliant installation. In this sense, the installation location is the foundation that shapes the entire vent hood system’s performance, safety, and longevity. The truck’s kitchen cannot function without a well-chosen location that respects the cooking zone, enables a straight and robust duct run, and remains faithful to fire safety and electrical codes. When these elements align, the result is a quieter kitchen with fewer grease deposits, better air quality for staff and customers, and a system that reliably translates heat and smoke into clean, outdoor exhaust. As the truck travels from one busy service window to the next, that location choice stands as a quiet, constant undercurrent—an informed, disciplined decision that makes every service safer and more predictable. For exact technical specifications, safety guidelines, and compliance details, consult the official installation manual: official range hood installation manual.
Foundation First: Securing the Hood Frame for Safe, Efficient Ventilation in a Mobile Kitchen
In a food truck, the vent hood is more than a filter and fan housing; it is the foundation of a safe, compliant, and efficient cooking environment on wheels. Mounting the hood frame properly is not a cosmetic step but a core installation task that supports every downstream system—ducts, grease management, electrical connections, and even the fire suppression components that keep a mobile kitchen compliant with local codes. The frame anchors the entire assembly to the vehicle, absorbing vibrations from the road, weather forces, and the constant movement of a working kitchen. When done with care, it ensures consistent airflow, reliable service, and easier maintenance, which, in turn, protects staff and customers alike. The process blends precise measurement, sturdy fasteners, and a respect for the vehicle’s structure that transcends the kitchen’s momentary needs.
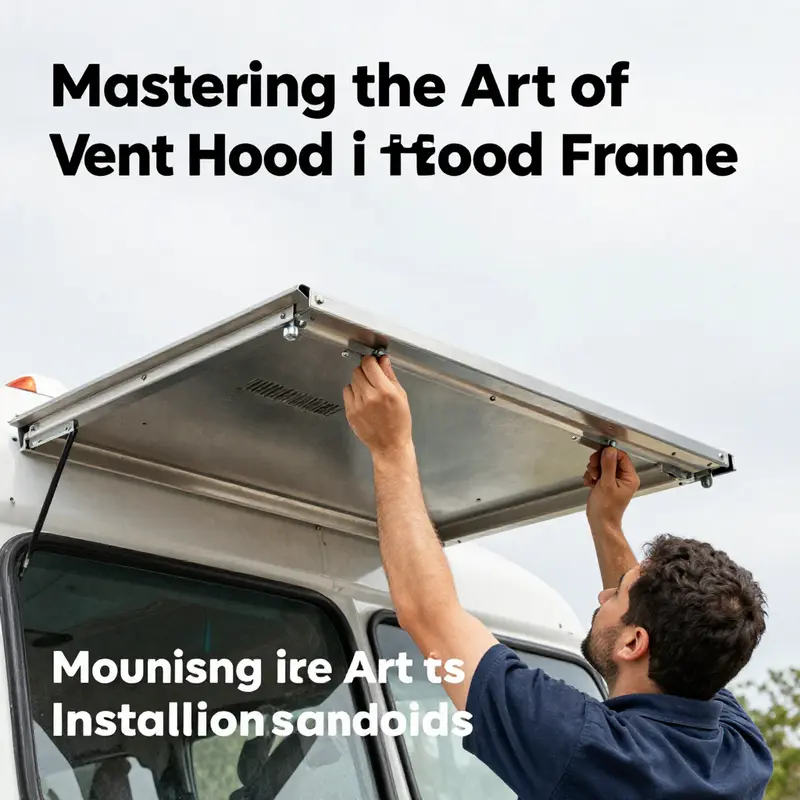
Choosing the right location for mounting begins with looking upward and inward at the same time. The hood frame should sit directly above the cooking surface, ideally aligning with the hood’s exhaust outlet so gravity and airflow guide vapors smoothly toward the outside. In practice, this means identifying a ceiling or wall zone in the kitchen where a robust support point exists without obstructing overhead cabinets, lighting fixtures, or essential ventilation equipment already in place. It also means planning for the truck’s unique geometry. Roof contours, internal insulation, and the availability of reinforced panels all influence where the frame can be anchored. A careful assessment at this stage pays dividends in quieter operation, less vibration transfer to the hood, and fewer rework trips later on. For operators weighing how space will be used, the choice between a compact or more expansive layout has a practical, mechanical corollary: the frame must sit where it can be bolted to legitimate structural members rather than skin-level metal sheeting.
The hardware you choose for this critical job should be corrosion-resistant and capable of withstanding a mobile environment. Stainless steel bolts, brackets, and expansion anchors are standard because they resist grease, cleaning solvents, and the temperature swings that come with a busy kitchen. The goal isn’t simply to attach a piece of metal to a panel; it is to create a robust, vibration-damping connection that will not loosen or shift as the truck drives between venues or negotiates potholes. The recommendation to fasten the frame to structural supports—floor joists, roof rafters, or reinforced wall studs—cannot be overstated. Drywall or thin panels, no matter how well-sealed, do not offer the kind of rigidity required to withstand the dynamic movement of a mobile kitchen. In addition to the structural anchors, you’ll typically rely on expansion bolts or through-bolts paired with backing hardware to distribute the load across a broader area of support. This combination prevents point-load failures and reduces the risk of warping as the hood is loaded with its internal components and, eventually, grease filters.
With location and hardware defined, the marking and drilling phase becomes a fit-and-finish exercise that tests both planning and patience. A top-quality install begins with a stud finder and a level. You map out exact mounting points on the chosen structural members. Precision matters here because a misaligned frame can translate into a crooked hood, uneven duct connections, and improper sealLines around penetration points that invite leaks. Mark the pilot holes clearly, then pre-drill to prevent material splitting. If the truck uses metal panels, you may encounter rivets or stiffeners that require careful clearance, so plan for minor adjustments during the final alignment. As you mark, keep the hood’s eventual exhaust outlet in check. The alignment must minimize any lateral stress on the ductwork as it exits the vehicle. A single centimeter of misalignment at the frame can translate into added drag on the duct, more turbulence, and a noisier operation.
When it comes time to secure the frame, approach the task with a steady hand and a methodical rhythm. Start by loosely placing the brackets and bolts to confirm fit. Then tighten gradually, alternating sides to keep the frame square. After each incremental tightening, recheck the level and adjust as needed. The aim is a frame that is perfectly plumb and rigid, resisting the flexes that inevitably come from road vibration and sudden stops. The moment you feel looseness or hear creaks during tightening is a cue to back off, re-check the mounting holes, and perhaps introduce a thicker gasket or seal at the bracket interface to dampen movement. Weatherproof sealants around penetrations should be applied after the frame is secured, sealing every bolt head and each anchor point to deter water intrusion and grease ingress. This detail becomes especially important if the hood design requires a roof penetration or an exterior wall pass-through for the duct. A well-sealed penetrator reduces ingress of rain, wind-driven debris, and grease-laden air that could otherwise degrade performance or invite corrosion over months of operation.
Securing the hood frame is inseparable from safety and regulatory compliance. A properly mounted frame is foundational to the hood’s performance, but it also sets the stage for the ductwork, the grease filtration pathway, and the fire protection system that your operation will rely on in worst-case scenarios. The National Fire Protection Association’s standard for ventilation and fire protection of commercial cooking operations emphasizes the necessity of a reliable, well-designed exhaust path. That means the frame must be able to bear the weight of the hood and any attached components while maintaining a sealed, straight run for the duct. It also means that the frame location should not complicate the routing of ductwork or introduce awkward bends that degrade airflow. A straight, short run is preferable, and the frame’s mounting should support that goal from day one. The installation manual of the hood system itself will often provide specific guidance on bracket spacing, bolt size, and tolerances. In practice, adherence to these manufacturer specifications, coupled with the NFPA 96 guidelines, creates a safer, more maintainable kitchen that resists the shocks of daily use in a mobile environment.
As you progress from the frame to the ductwork, the frame’s integrity continues to influence the overall efficiency of the system. A well-secured frame forms a rigid base for attaching the grease filters and any fire suppression components that must be integrated as part of a compliant installation. The alignment between the hood and the exhaust outlet becomes critical here; a misaligned frame can place unwanted angles on the duct, causing turbulence, louder operation, and uneven grease capture. If the space is tight, you may need to consider a compact, high-efficiency fan system that fits within the hood’s footprint without forcing you to alter the frame. In such cases, the frame must still anchor firmly to support this added equipment without succumbing to road-induced movement.
The practical steps of this mounting sequence are less about drama and more about a disciplined, incremental approach. Start by locating the frame in a position that respects the cooking station’s geometry. Mark the mounting points with a pencil, then fire up a level to confirm true horizontal and vertical alignment. Drill pilot holes with a carefully measured stance, keeping the drill perpendicular to the mounting surface to avoid enlarging holes unevenly. As you install the expansion anchors or through-bolts, alternate the tightening across each point. This ensures even pull and minimizes the risk of skewing the frame under load. After the frame is fixed, attach the main body of the hood to the brackets. At this stage, it’s prudent to verify once more that the hood sits square and remains aligned with the exhaust outlet as designed. Only after these checks should you move on to the next steps of installing the ducting, the grease filtration pathway, and eventually the protective fire suppression systems that complete the system.
The broader best practices angle this chapter emphasizes is clear: do not skip the initial structural assessment, and do not shortcut the fastening stage with lighter hardware or less-than-designed anchors. The mobile kitchen is a dynamic environment; the hood’s frame bears the brunt of that dynamic load and translates it into a durable, safe exhaust path. In compliance terms, the NFPA standards consistently remind installers to build a system that can be inspected, maintained, and scaled as the kitchen evolves. If a hood is mounted with a frame that has flex, gaps, or misalignment, the entire ventilation system can underperform, and the smoke and grease vapor might not travel effectively to the exterior. The right combination of location, robust hardware, precise marking, and careful tightening creates a foundation that not only meets code requirements but also delivers reliable performance day after day, venue after venue.
For readers planning the truck layout, the decision between different vehicle types can subtly influence where you mount the hood frame. The volume and weight distribution, the height of interior ceilings, and the proximity of storage to the cooking zone affect both accessibility during installation and ease of maintenance later on. A useful point of reference in this regard is a guide discussing Step vans versus cargo vans for food trucks, which highlights how vehicle structure and dimensions shape equipment placement. You can explore this topic in more detail here: Step vans vs cargo vans for food trucks.
As you finalize the mounting, the overarching takeaway is that the hood frame is not a merely decorative feature but the backbone of a safe, functional mobile kitchen ventilation system. Its secure attachment to genuine structural supports, correct alignment with the cooking zone, and robust connection to the ductwork set a tone of reliability for every subsequent step. The frame’s rigidity underpins the performance of the exhaust fan, the efficiency of the duct run, and the long-term ease of cleaning and service. It also reinforces a culture of safety that aligns with NFPA 96 expectations, emphasizing that every element—from frame to fan to fire suppression—works in concert to protect your crew and customers. When the frame is installed with care, you invest in a quiet, durable system that makes daily operation smoother and more predictable, allowing you to focus on the art of cooking and the business of serving.
External resource: When you want to dive deeper into official guidance on ventilation control and fire protection for commercial cooking operations, consult the NFPA 96 overview. This resource provides the standards that help shape every choice in the installation, including how frames must be anchored, how ducts should be routed, and how critical components must be integrated to ensure a safe, compliant mobile kitchen. Official overview: https://www.nfpa.org/Code-Development/All-Codes-and-Standards/By-Number/96/Overview
Airflow on Wheels: Mastering Exhaust Fan and Ducting Installation in a Mobile Kitchen
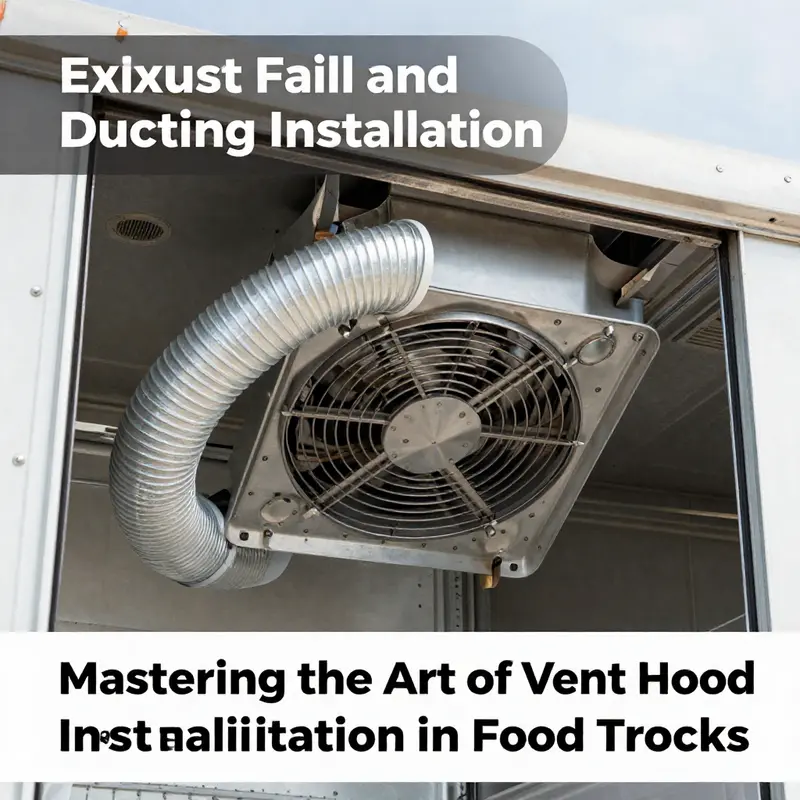
In a food truck, the kitchen is a small theater where heat, smoke, steam, and flavorful vapors perform a constant show. The vent hood is not a decorative feature; it is the quiet backbone of safety, comfort, and compliance. The exhaust fan and the ducting system work together to pull greasy air out of the cooking zone, carrying it through a maze of metal ducts to the exterior of the vehicle. When this system is designed and installed with care, it becomes a shield against heat buildup, a regulator of odor, and a line of defense against grease-fire hazards. When it is neglected, the kitchen can feel claustrophobic, smells can linger, and the risk of malfunctions rises. The aim is to craft a pathway for air that minimizes resistance, resists heat and corrosion, and remains accessible for routine cleaning and periodic professional service. This is especially important in a mobile setting, where space is a premium and the environment is subject to vibration, road dust, rain, and the need for rapid, effective cleaning between service days. The choice of exhaust fan and ducting begins with understanding the nature of the air you are moving. Most commercial kitchens rely on a centrifugal or blower-style exhaust fan for mobile operations because of the high static pressure that grease-laden air creates. The goal is to deliver the proper volume of air, measured in CFM, while maintaining a steady draft across the entire hood area. The correct CFM depends on the cooking load—the number and type of burners, the size of the cooking surface, and whether you have fryers, grills, or steam equipment. A hood that spans the width of the cooking area will typically require a fan with enough capacity to keep up with the most intense bursts of heat and smoke. In practice, this means evaluating your menu, your peak service times, and the way heat migrates toward the rear of the truck. The ventilation plan should be integrated with the truck’s overall layout, ensuring the hood sits above the main cooking zone and that duct runs are as direct as possible to the exterior. The ducting itself is the other critical half of the system. Metal ducts are essential in this setting because they withstand higher temperatures and resist grease buildup much better than plastic alternatives. Inside, the ducts should be smooth and uniform to minimize turbulence and resistance. The smoother the interior, the less effort the fan must expend to move air, which translates into lower energy use and longer component life. When planning routes, the path from hood to outside should favor the fewest bends and the most direct line possible. Every turn adds friction and potential leakage points. In a mobile kitchen, there is also the added complexity of securing the ducting so it remains stable when the vehicle is in motion. The weight of the duct and the force of vibrations demand sturdy connections, proper hangers, and careful fastening to the truck’s structure. This is one area where the planning undertaken during the early layout stage pays dividends during installation and long-term maintenance. The physical mounting of the hood and the fan should feel almost ceremonial in its precision. The hood is mounted above the cooking equipment, aligned with the centerline of the grill or range, and leveled so that water and grease do not pool on the surfaces. Securing the hood to the roof or wall requires brackets, bolts, and washers sized for the truck’s construction. It is crucial to seal all penetrations with a high-temperature, weatherproof sealant that remains flexible in a wide temperature range. Sealing is not a cosmetic measure; it prevents leaks that could degrade insulation, promote rust, or allow moisture into electrical components. Once the hood is anchored, the ducting connect follows in a rhythm that mirrors a well-rehearsed kitchen routine. The ducting is attached to the hood outlet with clamps or flanges designed for durable, grease-resistant operation. The run toward the exterior should be kept straight and supported at regular intervals to prevent sagging. If space constraints force a bend, use carefully engineered angles or flexible sections that maintain airflow without creating sharp turns. It is essential to seal all joints with duct mastic or metal foil tape rated for high temperatures and capable of resisting the corrosive effects of kitchen grease. These details are not merely technicalities; they ensure that the system remains efficient, safe, and compliant with fire and health codes. The regulatory framework around mobile kitchen ventilation is explicit and rigorous. NFPA 96, the National Fire Protection Association Standard for Ventilation Control and Fire Protection of Commercial Cooking Operations, provides the blueprint for designing, installing, and maintaining a vent hood system in any commercial kitchen, including food trucks. It emphasizes the need for a non-recirculating, ducted exhaust system and for proper discharge to the outdoors. The importance of dampers, backdraft prevention, and fire-rated penetrations cannot be overstated in a moving vehicle where a fire incident would be catastrophic. In practice, this translates to ensuring the duct outlet outside the truck is weatherproof and equipped with a backdraft damper to prevent reverse airflow during wind gusts or when the fan is off. The exit point itself should be chosen with regard to safety, clearance from pedestrians, and local regulations about height above the ground. A properly routed exit also helps minimize the intrusion of rain, pests, and debris into the outdoor portion of the system. The electrical side of the installation is equally critical and must be treated with the same respect given to fire safety. The fan is typically wired to a dedicated circuit, and it should be connected to a grounded power source through a GFCI-protected outlet. This precaution protects staff at the work zone from electrical shock and helps prevent nuisance trips that could interrupt service during busy periods. Before turning the system on, a careful inspection is in order. Visual checks for loose clamps, misaligned joints, and any signs of compression on duct sections are essential. When the fan is powered, listen for unusual noises that might indicate a loose part, misalignment, or a crack in a seal. A healthy system should move air smoothly and steadily, without vibrations that could loosen fasteners or loosen the hood fixture itself. The aim is not only performance but also longevity; a well-installed vent hood reduces grease deposition, minimizes heat buildup, and supports a kitchen that operates quietly enough to keep the crew focused on cooking. Regular maintenance becomes a discipline that sustains this balance. A weekly routine that includes wiping down the hood and inspecting duct interiors for grease buildup can prevent a broader cleaning that is more disruptive. A professional maintenance clean every three to six months is also recommended, aligning with the higher standards of fire protection and food safety. The synergy between the hood, the fan, and the duct run is a living system that responds to your kitchen’s rhythms. During high-volume service, the fan may need to run at higher speeds to extract air quickly, while on slower days, a reduced speed setting can preserve energy and reduce noise. The more precisely the system is tuned to your cooking load, the more comfortable the working environment will be for staff and the cleaner the truck will be at the end of the day. For those who want to explore deeper technical guidance while maintaining focus on practical execution, a trusted external guide offers a comprehensive, step-by-step perspective on hood installation, including mounting, ducting, sealing, and compliance considerations. This reference reinforces the approach described here and provides additional context for vendors and health inspectors alike: https://www.cookingequipment.com/blog/how-to-install-a-vent-hood-in-a-food-truck/. To connect this practical knowledge with broader conversations about kitchen design and safety, you can also explore the internal perspective offered in blog-2, which discusses the evolving landscape of Latino food trucks and their operational details: blog-2. While the specifics of each truck will vary, the underlying principles remain consistent: the vent hood system must be robust, accessible for cleaning, and aligned with local codes and standards that protect both workers and customers. The quiet efficiency of a well-executed exhaust fan and ducting installation pays dividends in the form of safer air quality, improved comfort during long service runs, and lower maintenance costs over the life of the truck. It also prevents backpressure from compromising the performance of burners or fryers, ensuring that the kitchen operates at peak efficiency even on busy nights. The habit of planning ahead—selecting a fan with appropriate static pressure characteristics, choosing durable metal ducting, planning a concise duct route with the fewest bends, securing all joints, and implementing a rigorous cleaning schedule—creates a reliable foundation for every service. In the final analysis, the exhaust fan and ducting are not just a set of parts to assemble; they are a functional system that protects people, preserves equipment, and supports consistent, high-quality food service from the back of a moving kitchen. When installation is approached with discipline, it becomes a narrative of safety and efficiency that travels with the truck, season after season. The result is a kitchen that breathes easier, feels cooler for the team, and meets the demanding expectations of health inspectors and customers alike. It is the difference between a kitchen that merely cooks and a kitchen that sustains a thriving mobile business. As you move forward with your project, keep in mind that the hood is the star of the heat management story, but the fan and ducting are its dependable backstage crew. They deserve thoughtful selection, careful placement, and a shared commitment to ongoing maintenance. For readers seeking to place this guidance within a broader context, the internal link to blog-2 offers related perspectives on how these technical choices intersect with business considerations and daily workflow in Latino food trucks. And for those who want to cross-check the technical depth with an industry-standard reference, the external source linked above provides authoritative, code-aligned guidance that complements the practical steps laid out here.
Final thoughts
Completing the installation of a vent hood in a food truck is not just about adhering to safety regulations; it’s about crafting a seamless cooking environment that enhances efficiency and protects the team. By following the outlined steps—from preparation and location selection to secure mounting and ducting installation—you ensure your food truck operates smoothly and safely. Elevate your culinary ventures with a professionally installed vent hood, contributing to the overall success of your mobile kitchen.